
A shop drawing approval process turns design requirements into controlled fabrication and installation information. It should show who prepares each drawing, who checks coordination, what the reviewer is expected to assess, how comments are resolved, and which revision is authorized for the next action. Because contracts use different review terms and approval statuses, the project’s own requirements—not a generic workflow—must decide whether procurement, fabrication, shipment, or installation may proceed.
Important: This guide explains common practice, not a universal contract rule. The agreement, specifications, approved submittal procedure, local law, and instructions of the responsible design professionals govern each project.
Written by Winston
Project Director at Skyland Building · 10+ Years of Building Materials Experience
Updated October 3, 2026
Key Takeaways
- Shop drawings develop fabrication, assembly, and installation information for a defined portion of the work; they do not replace the contract drawings or specifications.
- The contractor’s internal review should happen before the package reaches the architect, engineer, consultant, owner, or other named reviewer.
- A complete submission links dimensions, materials, finishes, interfaces, product data, calculations, samples, and known deviations to the correct revision.
- Review or approval usually has a limited purpose and does not automatically transfer responsibility for field measurements, quantities, coordination, means and methods, or contract compliance.
- Approval terminology is project-specific. Production should be released only against a documented status that the contract expressly permits.
Shop Drawing Approval at a Glance
The shop drawing approval process has eight practical steps: define the review route, confirm source information, prepare the drawing, check it internally, submit, review, resolve comments, and release the exact revision. Use the table below to check the record produced at each step, then follow the detailed workflow and approval checklist.
| Step | Lead party to assign | Record to retain |
| 1. Define submittals | Contractor / project coordinator | Registered item, required reviewers, permitted statuses and review dates. |
| 2. Confirm sources | Contractor with relevant trades | Current drawing and specification revisions, verified field data and open RFIs. |
| 3. Prepare drawings | Supplier / fabricator | Coordinated drawing set, supporting data and separately declared deviations. |
| 4. Check internally | Contractor’s checker | Recorded completeness, interface and compliance check before submission. |
| 5. Submit | Contractor / document controller | Controlled transmittal with package ID, exact revision and requested action. |
| 6. Review | Named project reviewers | Dated formal response, comments and project-defined status. |
| 7. Revise and resubmit | Drawing originator / comment owners | Response matrix, marked revisions and evidence for each closed comment. |
| 8. Release | Authorized release owner | Exact revision, permitted action, distribution list and withdrawal of superseded copies. |
Go to the approval checklist or see a filled comment-response example. Assign the parties and release authority using your project procedure.
What Shop Drawings Are—and Are Not
Shop drawings are project-specific documents prepared by or for a contractor, subcontractor, supplier, or fabricator. They explain how a particular component or system is proposed to be fabricated, assembled, fitted, and installed. Depending on the trade, the set may include plans, elevations, sections, schedules, diagrams, setting-out information, fixing details, product references, and supporting data.
They sit between design information and execution. A design drawing communicates the required scope and design intent; a shop drawing develops the supplier- or contractor-side information needed to make and install that scope. The reviewer then takes the action required by the contract. An approved shop drawing is therefore not automatically a redesign, a permit drawing, an as-built record, or a blanket acceptance of every dimension and method shown.
Shop drawings vs. related project documents

| Document | Primary purpose | Typical originator | Key caution |
| Contract/design drawings | Define scope, design intent, and required relationships | Architect, engineer, or other designer | Remain governing documents unless formally changed |
| Shop drawings | Develop fabrication, assembly, and installation information | Contractor, fabricator, supplier, or subcontractor | Must identify deviations and coordinate interfaces |
| Product data / samples | Describe or demonstrate products, finishes, and performance evidence | Manufacturer, supplier, or contractor | Must match the exact product and configuration proposed |
| Coordination drawings / model | Combine multiple trades to identify spatial conflicts | Contractor and relevant trades | Coordination does not itself approve a design change |
| Record / as-built information | Document the work as installed or finally accepted | Party assigned by the contract | Do not relabel an approved shop drawing as an as-built without verification |
What approval does—and does not—mean
The word approval can suggest more authority than a review stamp actually carries. On many projects, the design professional reviews submittals only for the limited purpose stated in the contract, such as apparent conformance with the design concept and information in the contract documents. The contractor may remain responsible for checking dimensions, quantities, field conditions, safety precautions, construction means and methods, and coordination among trades.
The same caution applies to deviations. A marked-up drawing does not necessarily amend the contract. If a proposed material, dimension, detail, or performance requirement differs from the contract documents, identify it clearly in the transmittal and use the project’s formal change or substitution procedure where required. Do not hide a variation among routine notes and assume the review stamp accepts it.
Shop Drawing Approval Process: 8 Practical Steps
The following workflow is a practical baseline. The project team should adapt the reviewers, sequence, status names, and release gates to the signed contract and approved submittal procedure.

Step 1: Define the required submittals and review route
Start with the specifications, submittal register, responsibility matrix, design programme, procurement schedule, and document-control procedure. Identify which items require approval, which are for information, who performs the contractor check, who gives the formal response, and whether specialty or authority review is also required. Use the shop drawing submittal register template to link each item to its specification section, location, responsible party, planned submission date, review period, fabrication need date, and site need date.
Step 2: Confirm the current source information
Collect the latest contract drawings, specifications, schedules, approved RFIs, design changes, site surveys, room data, finish decisions, samples, and interface drawings. Record the revision of every source. If a critical dimension or decision is missing, label it as pending and raise the required RFI instead of converting an assumption into a production dimension.
Step 3: Prepare the coordinated shop drawing set
The fabricator or supplier develops the drawing at the level needed to produce and install the component. Show overall and critical dimensions, datums, tolerances, sections, joints, fixings, materials, finishes, hardware, accessories, interfaces, quantities or tags where relevant, and references to supporting data. Use stable drawing numbers and make the revision history visible.
Step 4: Complete the contractor’s internal review
Before submission, the contractor checks the set for accuracy, completeness, contract compliance, verified field conditions, trade coordination, sequence, and consistency with related submittals. The internal review should also confirm that deviations are listed separately and that required calculations, product data, samples, certificates, or method information are attached. Use the technical submittal checklist to check the evidence attached to the drawing set. A package that has not passed this check should not be sent forward merely to protect a date in the register.
Step 5: Submit through a controlled transmittal
Issue one complete package through the approved document system. The transmittal should identify the project, submittal number, specification section, drawing numbers, revision, purpose of issue, requested action, response due date, related submittals, and any declared deviation. Avoid parallel email copies that create uncertainty about which file is official.
Step 6: Perform the defined technical and design review
The architect, engineer, consultant, owner, or other named reviewer assesses only the matters assigned by the contract. Review may include design intent, specified materials and finishes, performance criteria, visible interfaces, delegated-design information, and coordination with the reviewer’s discipline. Comments from multiple reviewers should be reconciled before one formal status is returned.
Step 7: Respond, revise, and resubmit
Create a comment-response matrix that preserves each original comment, assigns an owner, states the response, and points to the exact revised sheet or supporting document. Cloud or otherwise identify changes according to the document-control procedure. Carry unresolved comments forward; do not silently delete them or overwrite the previous revision.
Step 8: Record the status and release the correct revision
The formal response should show the status, date, reviewer, revision, conditions, and required next action. The contractor then verifies whether that status permits material reservation, procurement, mock-up production, full fabrication, shipment, or installation. Distribute only the released revision, withdraw superseded copies from active use, and retain the submission, markup, responses, and final record together.
Who Does What in the Approval Workflow?
Roles differ by delivery method and contract. The following table is a planning aid, not a substitute for the project responsibility matrix.
| Party | Typical contribution | Responsibility that should remain explicit |
| Owner / project manager | Defines owner decisions, programme priorities, and required approvals | Aesthetic or commercial acceptance does not replace technical review |
| Contractor | Manages the register, checks coordination and completeness, submits, distributes, and controls revisions | Field verification, trade coordination, sequencing, and contractual obligations |
| Fabricator / supplier | Prepares accurate production information and confirms manufacturing feasibility | Product-specific details, tolerances, declared limitations, and consistency with the released revision |
| Architect / engineer / consultant | Reviews the matters assigned by the professional agreement and construction contract | Review scope and liability are limited by the applicable contract and law |
| Delegated-design professional | Provides calculations or design information for an assigned specialty scope | Licensing, seals, criteria, and review route depend on the jurisdiction and contract |
| Document controller | Registers, routes, timestamps, archives, and distributes controlled files | Administrative control does not make technical decisions |
What a Complete Shop Drawing Submittal Should Include

A complete package should let the reviewer understand what is proposed, where it belongs, how it connects to adjacent work, and what decision is requested without searching across unrelated email threads. The exact requirements must come from the contract, but the following groups are useful for a pre-submission check.
Administrative and revision information
- Project name, submittal number, specification section, drawing number, revision, date, and purpose of issue.
- Originator, contractor checker, named reviewer, related drawing or schedule references, and required response date.
- A revision narrative plus clear identification of changed areas and unresolved comments.
- A separate declaration of deviations, substitutions, exclusions, assumptions, and pending information.
Dimensions, materials, and fabrication information
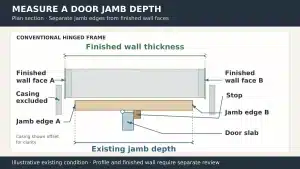
- Overall dimensions, critical fabrication dimensions, levels, datums, openings, clearances, joint widths, and tolerances.
- Material type, grade or specification, thickness, finish, color or sample reference, and product identifier where applicable.
- Plans, elevations, sections, enlarged details, assembly methods, fixings, anchors, joints, hardware positions, edge treatments, and access panels.
- Explicit notation showing whether field dimensions are verified, assumed, or awaiting confirmation.
Interfaces, performance evidence, and supporting submittals
- Adjacent finishes, substrates, waterproofing, structure, building services, movement joints, fire or acoustic boundaries, and required access zones.
- Calculations, test reports, product data, certificates, samples, mock-ups, and manufacturer instructions required by the specification.
- Evidence traceable to the exact product, dimensions, configuration, and application shown—not a generic brochure for a different system.
- Identification of the document that governs when a sample, schedule, product data sheet, and drawing do not agree.
How to Review Custom Building Material Shop Drawings
Custom windows, doors, cabinetry, stone, sanitary fixtures, and related materials depend on interfaces that may sit across several drawings. A useful review follows the component from design intent through fabrication and installation instead of checking only its front elevation.
Check design intent and visible details
Compare proportions, profiles, module lines, reveals, joints, colors, textures, sheen, grain or pattern direction, hardware locations, and transitions against the approved design information and samples. Link each finish or material reference through the material sample approval process so the sample ID, drawing revision and proposed product agree. Confirm that corners, returns, end conditions, repeated units, and special locations have been developed—not just the typical bay.
Check technical criteria and evidence
Identify the performance criteria that actually apply to the item, such as loads, movement, moisture exposure, fire or acoustic separation, safety glazing, accessibility, or corrosion environment. Confirm that any calculation, report, or certificate relates to the proposed product and configuration. A missing report is not the same as a failed requirement; record what evidence is absent and who must provide it.
Check interfaces, installation, and future access
Follow every boundary with adjacent work. Check sill and threshold levels, wall build-ups, floor finishes, waterproofing returns, countertop and cabinet junctions, stone-to-metal edges, service penetrations, ceiling transitions, access panels, and replacement clearances. Also consider piece sizes, routes into the building, lifting or handling points, adjustment ranges, fastener access, protection, and installation sequence.
| Material category | Drawing focus | Interfaces to coordinate |
| Windows and exterior doors | Opening size, frame sections, glass/build-up references, hardware, drainage, anchors, and perimeter joints | Structure, sill, waterproofing, facade finish, interior reveal, and floor level |
| Cabinets and wardrobes | Carcass, doors, panels, hardware, fillers, worktops, cut-outs, ventilation, and service voids | Walls, floors, ceilings, appliances, plumbing, electrical points, stone, and lighting |
| Stone and tile | Module, thickness, joint layout, edge detail, cut-outs, support, and finish direction | Substrate, waterproofing, movement joints, drains, cabinetry, metal trims, and fixtures |
| Sanitary ware | Model reference, mounting, clearances, concealed components, and access | Plumbing points, wall build-up, waterproofing, cabinetry, power, and maintenance access |
Approval Statuses: Do Not Assume the Meaning
Projects use different stamps and codes. Some use phrases such as “No Exceptions Taken,” “Approved as Noted,” or “Revise and Resubmit”; others use letters, numbers, or workflow-specific suitability codes. Even identical labels can have different consequences. Define each status in the submittal procedure and connect it to a permitted action.
| Example status | Typical interpretation only | Required control |
| Reviewed / No exceptions / Approved | No review comments that block the defined next action | Confirm the exact revision and the action the contract permits |
| Approved as noted / Make corrections noted | Comments remain and may or may not permit limited progress | Classify every comment as blocking or non-blocking; do not guess |
| Revise and resubmit | The affected work is not accepted for the requested action | Revise, respond to every comment, and obtain a new formal status |
| Rejected / Not approved | The proposal does not meet the review requirements | Do not proceed with the affected work; correct the basis of submission |
| For information / Record only | The recipient is not being asked to approve the item | Do not treat receipt or filing as permission to fabricate or install |
Release rule: Do not use a generic status table as contractual authority. The released action—material reservation, procurement, mock-up, fabrication, shipment, or installation—should be stated against the exact revision.
Managing Comments, Revisions, and Design Changes
Write comments that lead to a verifiable response
A useful comment identifies the location, requirement, discrepancy, required action, responsible party, and evidence needed for closure. “Please revise” is weaker than a comment that names the affected detail and explains what must be coordinated. Where several reviewers are involved, one lead party should reconcile contradictory comments before the package is returned.
Use a comment-response matrix

Filled Comment-Response Matrix Example
Keep the original comment, owner, response, evidence and closure status in separate record fields. The compact example below combines those fields for readability. All IDs and values are illustrative; the example is not a project approval record. A revised drawing alone does not close a comment until the required reviewer or release owner accepts the evidence.
| Comment ID and finding | Owner, response and evidence | Drawing reference and release status |
| C-01: Verify the opening width before cutting the frame. | Contractor survey lead: field measurement recorded as 1,200 mm in survey SV-07; supplier updates the fabrication dimension. | W-101 Rev B, detail 2. Closed only after the required reviewer confirms the survey and revision. |
| C-02: Confirm that the proposed finish matches the approved sample. | Supplier coordinator: cross-reference sample AL-03 and its approval record SA-014; update the finish schedule. | W-101 Rev B, finish note F1. Evidence submitted; hold the finish order until closure is recorded. |
| C-03: Resolve an anchor position conflict with the adjacent waterproofing detail. | Contractor / relevant designers: issue RFI-022 and revise the coordinated interface after the formal response. | W-102 Rev B, detail 5. Open and blocking; affected fabrication remains on hold. |
Revision Release Control
Create a release entry separate from the review stamp. Record the package and drawing IDs, exact revision, formal response reference, comment closure evidence, permitted action and scope, authorizing person, date, and recipients. For a partial release, identify the affected sheets, components and exclusions; do not extend it to the full package.
Example: W-101 Rev B may be released for the stated frame scope only after the authorized owner records closure of C-01 and C-02. W-102 and the anchor interface remain on hold while C-03 is open. When the next revision is issued, archive the prior release, withdraw superseded factory and site copies, and record who received the replacement.
Separate review comments from formal changes
A reviewer’s note may clarify an existing requirement, request missing information, or propose a change. These are not always contractually equivalent. If the comment changes scope, material, performance, cost, time, or design responsibility, route it through the project’s formal change process. The drawing revision should then reference the approved instruction rather than relying on an informal markup.
Common Causes of Delay or Rejection
- The package uses superseded design information or does not identify source revisions.
- Critical field dimensions, levels, openings, or interfaces are assumed but presented as confirmed.
- A drawing shows a material or detail that differs from the specification without a declared deviation.
- Related product data, calculations, test evidence, samples, or mock-up decisions are missing or inconsistent.
- The contractor submits the fabricator’s drawing without completing its own coordination and compliance check.
- Comments from different disciplines conflict, or nobody is assigned to consolidate the final response.
- A revised file overwrites the previous issue, obscuring what changed and which comments remain open.
- The team treats an email, meeting remark, or document receipt as approval to start work.
The most reliable response is not an arbitrary promise of faster approval. It is a complete submission, an agreed review route, realistic review periods in the schedule, named decision owners, and a controlled record linking every comment to the revision that resolved it.
Shop Drawing Approval Checklist
Before submission
- The submittal is required and registered under the correct specification section and location.
- Every source drawing, schedule, RFI, sample, and instruction uses the current revision.
- Dimensions and site conditions are identified as verified, assumed, or pending.
- Materials, finishes, hardware, accessories, tolerances, fixings, and interfaces are shown clearly.
- Required product data, calculations, tests, certificates, samples, and mock-ups are attached and cross-referenced.
- Deviations, substitutions, exclusions, assumptions, and outstanding decisions are declared separately.
- The contractor’s internal coordination and compliance review is documented.
- The transmittal requests a defined action and names the required response date.
Before procurement, fabrication, or installation
- The formal status applies to the exact drawing and revision in hand.
- Every blocking comment is closed or covered by an explicit written authorization.
- The drawing, approved samples, product data, calculations, and specifications describe the same item.
- Any contract change or accepted deviation has been processed through the required procedure.
- The released action is clear: reservation, purchase, mock-up, fabrication, shipment, or installation.
- Superseded revisions have been withdrawn from the factory, procurement team, and site distribution.
- Inspection, hold-point, packaging, labelling, and site-readiness requirements are linked to the released information where applicable.
How Skyland Can Support the Supplier-Side Package

For multi-category building material procurement, the supplier-side package may need to connect drawings, schedules, finish selections, samples, product data, and production references across windows, doors, cabinets, tile, stone, sanitary ware, and related items. Skyland’s Drawing & Sample Coordination service can help organize those material and supplier inputs for coordinated review and quotation. Project design approval, code compliance decisions, field verification, and professional responsibility remain with the parties assigned by the contract and applicable law.
Prepare for review: Send the available floor plans, schedules, specifications, finish references, site measurements, and target delivery information so the required supplier documents can be identified before production.
Conclusion
A reliable shop drawing approval process is not a single stamp at the end of drafting. It is a controlled sequence that begins with current source information, continues through contractor coordination and defined professional review, and ends with an explicit release of the correct revision. When responsibilities, deviations, comments, evidence, statuses, and next actions remain visible, project teams can make better production decisions without confusing document review with a transfer of contractual responsibility.
Frequently Asked Questions
What is the shop drawing approval process?
It is the project-defined workflow for preparing, coordinating, submitting, reviewing, revising, recording, and releasing shop drawings for a particular component or system.
Who prepares and checks shop drawings?
A contractor, subcontractor, supplier, fabricator, or specialist commonly prepares them. The contractor usually performs an internal coordination and compliance review before forwarding the package, unless the contract establishes another route.
Does an architect’s or engineer’s review make the drawing error-free?
No. The review normally has the limited purpose stated in the contract. Responsibilities for dimensions, field conditions, coordination, construction methods, and compliance should not be assumed to transfer through a review stamp.
Can fabrication start after “approved as noted”?
Only if the project’s contract and status definition permit the intended action and no comment blocks it. If the consequence is unclear, obtain a formal clarification before committing materials or production.
What happens when a shop drawing differs from the contract documents?
The variation should be identified clearly and separately at submission. The team should then use the required substitution, RFI, design-change, or contract-modification procedure rather than assuming the drawing review changes the contract.
How can repeated resubmissions be reduced?
Use current source documents, verify field conditions, complete the contractor review, coordinate related trades, attach required evidence, declare deviations, and return a response matrix that addresses every comment.
References and Contract Note
The following sources support the general principles in this article. They are examples of specific U.S. procedures and professional guidance, not universal contract terms:
- U.S. Federal Acquisition Regulation 52.236-21, Specifications and Drawings for Construction — Defines shop drawings for covered federal contracts, requires contractor coordination/review, and addresses variations and approval responsibility.
- U.S. Army Corps of Engineers ER 415-1-10, Contractor Submittal Procedures — Explains submittal registers, classifications, contractor quality control, transmittals, and review tracking in the USACE context.
- Los Angeles Bureau of Engineering, Shop Drawings Procedure — Provides an example of a public-owner shop drawing review workflow.
- American Institute of Architects, Standard of Care: Confronting Errors & Omissions Up Front — Distinguishes construction documents and design intent from the contractor’s means, methods, and work planning.
Always compare this guidance with the signed agreements, project specifications, approved submittal procedure, jurisdictional requirements, and instructions of the responsible licensed professionals.
Next Steps for Your Project
Topic hub: Drawings & Approvals Guides
Relevant product pages: Custom Cabinetry · Aluminum Windows & Doors · Structural Glass Facades
Related guides: Shop Drawing Submittal Register Template · Material Sample Approval Process · Construction Procurement Schedule
Related service: Drawing & Sample Coordination